

Only logged in customers who have purchased this product may leave a review.
Season 3 – All videos included!
£299.00
Click links below for the full details on what’s included
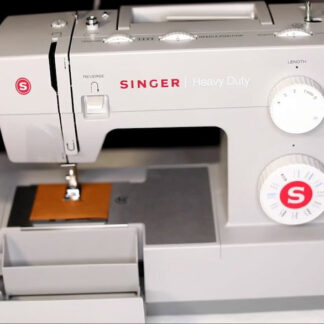
INTRODUCTION – GET YO KNOW YOUR SEWING MACHINE
Hi my name is Chrissy Bales and welcome to season 3 of my online e-learning tutorials!
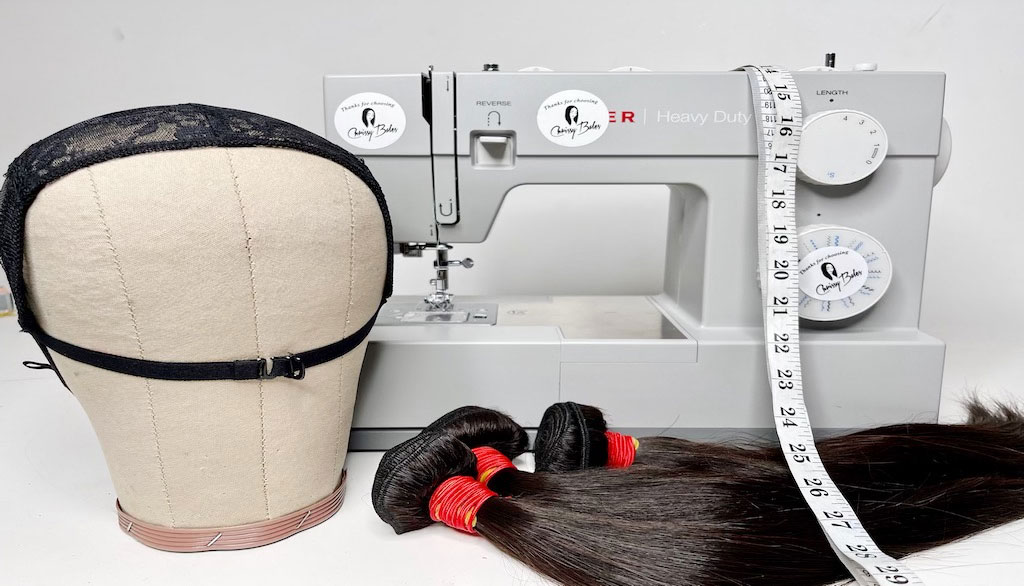
Part 1 of this series will show you the recommend sewing machine for making your wigs. I will
also provide a list of all the other vital equipment you need to complete your unit lace frontal
or lace closure unit when using a sewing machine.
In this video I’ll be teaching you how set up and thread the needle through the sewing machine. I
will also show, outline and explain all the compartments and functionalities of the machine.
Including how to manually adjust, lower and lift your needle and remove and replace the
bobbin.
This tutorial is perfect for beginners and also for those who want to perfect their skills when
constructing a wig using a sewing machine. Each step will be thoroughly explained and
demonstrated.
Watch up close to see exactly how to set up the sewing machine to construct a wig.
Please refer and follow all safety guidelines outlined in the manual that comes with
the sewing machine.
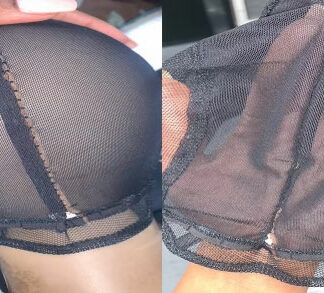
HOW TO SEW THE CAP ADJUSTMENT
Welcome to episode 2! At this point you should have your machine completely set up and ready to
start sewing using the machine.
In this episode I will be showing and explaining in depth how to adjust the circumference and
front to nape of the chosen cap size using the sewing machine.
I will also list all the equipment needed to successfully complete this step.
This tutorial is perfect for beginners and also for those who want to perfect their skills when
constructing a unit using a sewing machine.
Watch up close, in the comfort of your home how to execute the cap adjustment to achieve the
perfect fit.
This tutorial is perfect for beginners and those who are advanced but would like to perfect
their skills
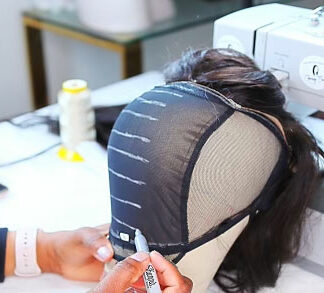
MAPPING THE GUIDELINES FOR LACE CLOSURE & LACE CLOSURE PLACEMENT
Welcome to episode 3. Now that we have set up the sewing machine and adjusted the cap size, we
are ready to start mapping the guideline for where we want to place the lace closure.
I will demonstrate and explain how to correctly place your cap on the canvas head to ensure the
mapping is done accurately. This step is very important to ensure we achieve the desired end
result.
I will also show my tips and tricks on how to ensure your lace closure is perfectly aligned and
placed in the centre of your cap.
This episode will also cover how to measure and map the guidelines on the cap.
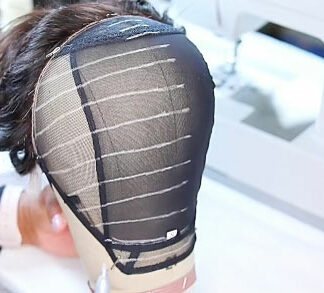
MAPPING THE GUIDELINE FOR LACE FRONTAL & LACE FRONTAL PLACEMENT
Welcome to episode 4. In this episode I will show you how to map the guidelines for making a frontal wig
I will demonstrate and explain how to correctly place your cap on the canvas head to ensure the mapping is done accurately for a lace frontal unit.
I will also show my tips and tricks on how to ensure your lace frontal is perfectly aligned and placed correctly on your cap.
Once the lace frontal has been placed and pinned to the cap, this episode will also cover how to measure and map the tracks onto the cap before you start sewing the wig.
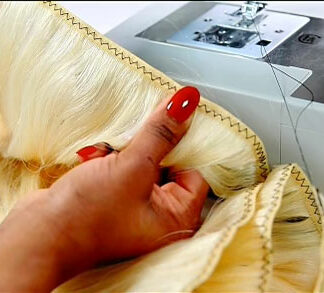
WEFT DOUBLING
Welcome to episode 5! In the episode I will show you how to double and quadruple the wefts. I will also show you the exact stitch pattern, length, width and tension you need for this step.
This episode will also cover how to place the wefts on to the sewing machine and the correct method to use when completing this step.
This tutorial is perfect for beginners and also for those who want to perfect their skills when constructing a unit using a sewing machine.
Watch up close, in the comfort of your home how to perfectly prepare your bundles using the doubling method.
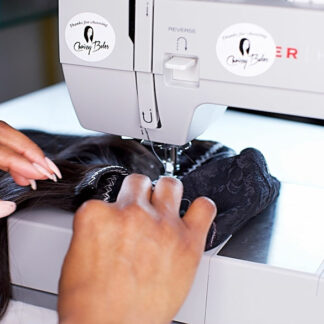
HOW TO SEW THE BUNDLES OF A CLOSURE WIG USING A SEWING MACHINE
Welcome to episode 6, part A. Now that we have successfully completed steps 1 to 5 we can begin constructing the wig using the sewing machine.
This episode will focus on how to construct the body of the unit for a lace closure wig using the sewing machine. I will show you the stitch pattern, length, width and tension required to complete this step.
This episode will also cover how to place the cap and the track on to the machine to ensure you begin constructing the unit in the right place. I will also demonstrate how to use the reverse method to secure the tracks in place.
To ensure I achieve the desired end result, I will show also show you exactly how to follow the mapping guidelines we completed in episode 3 to complete the body of the closure wig.
This tutorial is perfect for beginners and for those who would like to perfect their skills using a sewing machine.
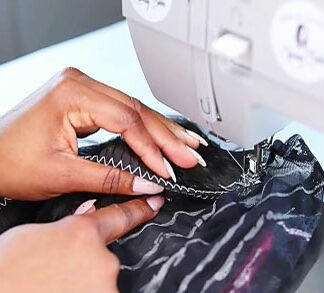
HOW TO ATTACH THE LACE CLOSURE TO THE WIG CAP
Welcome to episode 6, part B. In this part I will continue sewing the body of the lace closure wig using the sewing machine.
This episode will cover how to sew around the closure to attach it the cap with no lumps or bumps. I will also demonstrate how to use the reverse method to secure the tracks in place. To ensure I achieve the desired end result, I will show also show you exactly how to follow the mapping guidelines we completed in episode 3.
Remember, this tutorial is perfect for beginners and also for those who want to perfect their skills when constructing a unit using a sewing machine.
Watch up close and in the comfort of your home how to use a sewing machine to construct your lace closure unit
Please refer and follow all safety guidelines outlined in the manual when using the sewing machine
HOW TO SEW THE BUNDLES OF LACE FRONTAL WIG USING A SEWING MACHINE
Welcome to episode 7, part A. Now that we have successfully completed steps 1 to 5 we can begin constructing the wig using the sewing machine.
This episode will focus on how to construct the body of the unit for a lace frontal wig using the sewing machine. I will show you a simple way to prepare your bundles to make the process simpler and also to ensure a sleek, bump free wig.
I will show you the stitch pattern, length, width and tension required to complete this step.
This episode will also cover how to place the cap and the track on to the machine to ensure you begin constructing the unit in the right place. I will also demonstrate how to use the reverse method to secure the tracks in place. To ensure I achieve the desired end result, I will show also show you exactly how to follow the mapping guidelines we completed in episode 3.
Please refer and follow all safety guidelines outlined in the manual when using the sewing machine
HOW TO ATTACH THE LACE FRONTAL TO THE WIG CAP
Welcome to episode 7, part B. In this part of I will continue sewing the body of the lace frontal wig using the sewing machine
This episode will cover how to sew around the lace frontal to attach it the cap with no lumps or bumps. I will also demonstrate how to use the reverse method to secure the tracks in place. To ensure I achieve the desired end result, I will show also show you exactly how to follow the mapping guidelines we completed in episode 3.
This tutorial is perfect for beginners and also for those who want to perfect their skills when constructing a unit using a sewing machine.
Watch up close and in the comfort of your home how to use a sewing machine to construct your lace closure unit
Please refer and follow all safety guidelines outlined in the manual when using a sewing machine
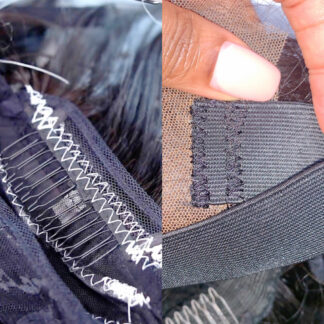
Bonus Episode includes
How to sew wig combs
How to attach the elastic wig band to the frontal (this is not the band method)
How to sew using a reverse method to start and end each track
Stream for 120 days
Reviews
There are no reviews yet.